██╗   ██╗██╗      █████╗ ██████╗ ██╗███╗   ███╗██╗██████╗     ██╗   ██╗ ██████╗ ██╗   ██╗██╗  ██╗
  ██║   ██║██║     ██╔══██╗██╔══██╗██║████╗ ████║██║██╔══██╗    ██║   ██║██╔═══██╗██║   ██║██║ ██╔╝
  ██║   ██║██║     ███████║██║  ██║██║██╔████╔██║██║██████╔╝    ██║   ██║██║   ██║██║   ██║█████╔╝
  ╚██╗ ██╔╝██║     ██╔══██║██║  ██║██║██║╚██╔╝██║██║██╔══██╗    ╚██╗ ██╔╝██║   ██║╚██╗ ██╔╝██╔═██╗
██╗╚████╔╝ ███████╗██║  ██║██████╔╝██║██║ ╚═╝ ██║██║██║  ██║     ╚████╔╝ ╚██████╔╝ ╚████╔╝ ██║  ██╗
╚═╝ ╚═══╝  ╚══════╝╚═╝  ╚═╝╚═════╝ ╚═╝╚═╝     ╚═╝╚═╝╚═╝  ╚═╝      ╚═══╝   ╚═════╝   ╚═══╝  ╚═╝  ╚═╝

Buckets

Deploy Static Web App to S3 Bucket

Let's deploy a static Next.js app to an S3 Bucket. I will use Yandex Object Storage (an S3-compatible service by Yandex). But it could be any S3 service and any "static" web app (Vite React, bare HTML, etc.); the process will be very similar.

Create Next.js App

bun create next-app
bun create next-app

Check everything works as expected by running the dev server:

bun run dev
bun run dev

Now we need to change the next.config.ts to:

import type { NextConfig } from 'next'

const nextConfig: NextConfig = {
/* config options here */
// cacheComponents: true,
// partialPrefetching: true,
output: 'export',
distDir: 'dist',
trailingSlash: true
}

export default nextConfig
import type { NextConfig } from 'next'

const nextConfig: NextConfig = {
/* config options here */
// cacheComponents: true,
// partialPrefetching: true,
output: 'export',
distDir: 'dist',
trailingSlash: true
}

export default nextConfig

We enabled the static export by setting output: 'export'. Also, the output folder was changed to dist (instead of out by default). We also need trailingSlash: true to make the Next.js routes work without the server (change links from /me -> /me/ and emit /me.html -> /me/index.html). Please see the docs for more details.

Let's build the app:

bun run build
bun run build

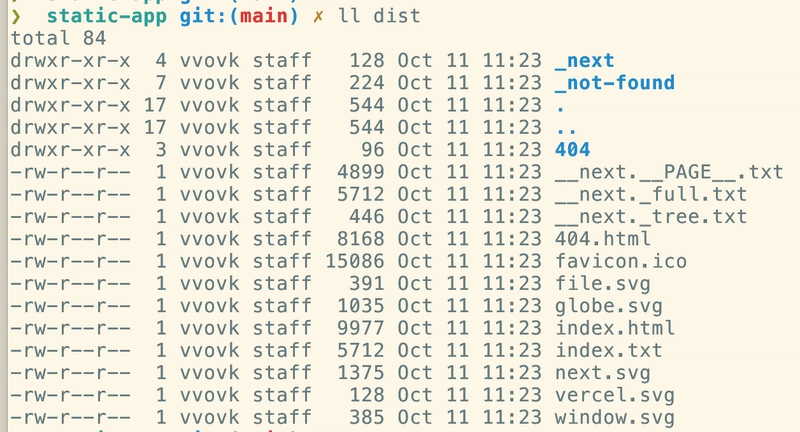
The dist folder should appear.

dist folder

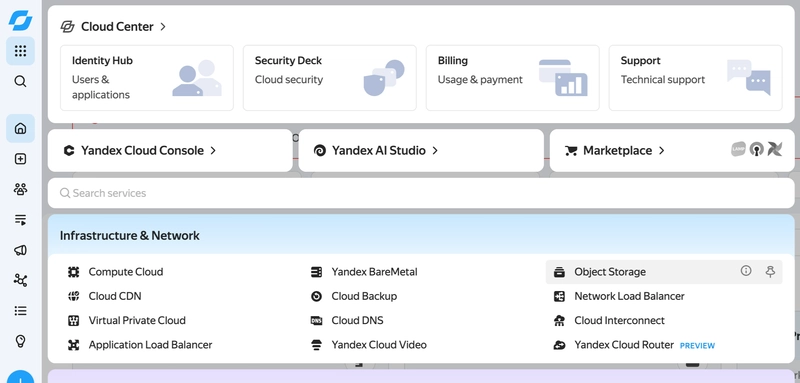
Yandex Cloud Console

Open the Yandex Cloud Console.

Yandex Cloud Console

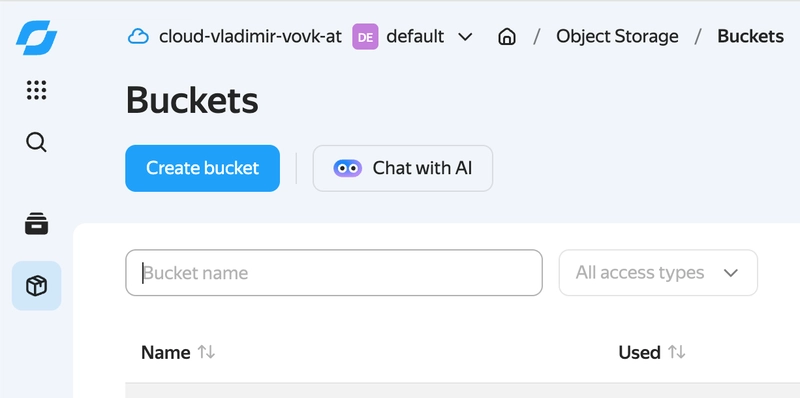
Go to the Object Storage.

Object Storage

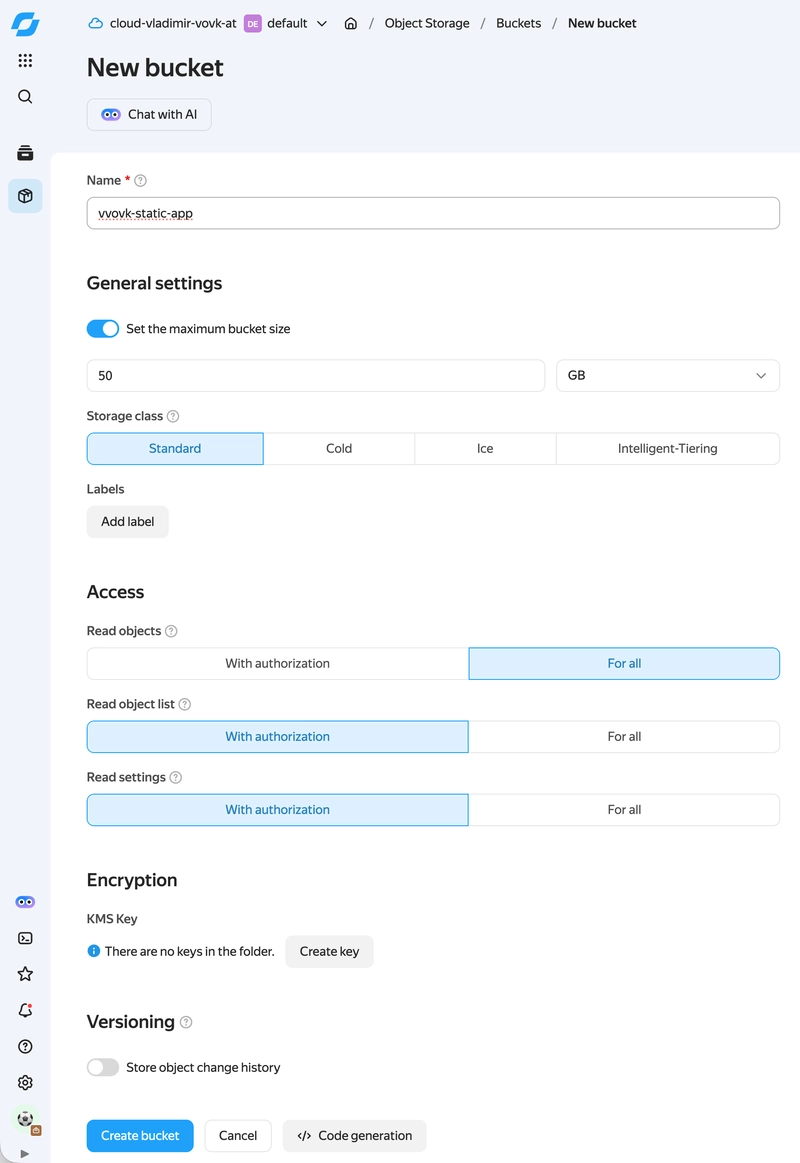
Create a new bucket (set Read objects -> For all).

New bucket

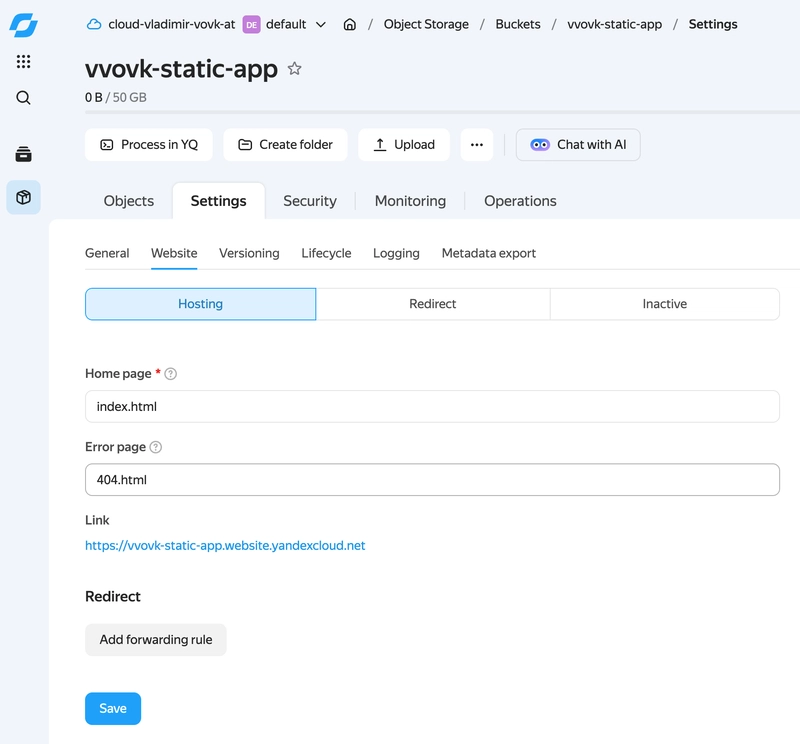
Click the bucket you created. Go to Settings -> Website -> turn on Hosting. Set the Home page and Error page values and click Save.

Hosting settings

Now our bucket is ready. 🎉

Deployment Script

Let's write a script to automate our deployment process. First, to be able to upload files to the bucket, we need a static key.

Create a Service Account and Assign Roles

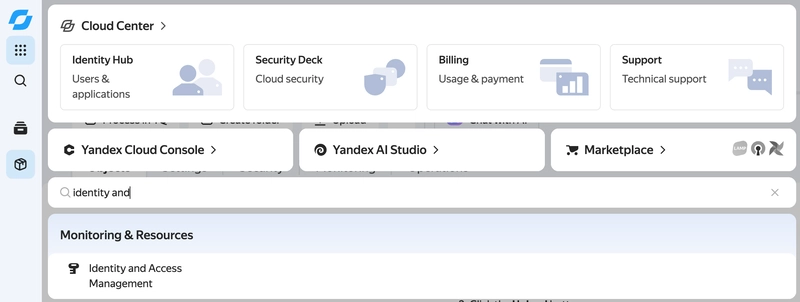
  1. Navigate to Identity and Access Management -> Service accounts.

Identity and Access Management

  1. Click Create service account, name it (for example, s3-copy-sa), and click Create.
  2. Assign the storage.editor role to the service account so it can manage and upload objects to your bucket.

Create the Static Access Key

  1. In the Service accounts list, select your newly created service account.
  2. In the top panel, click Create new key and select Create static access key.
  3. Add a description (optional) and click Create.
  4. Important: Copy and save the Key ID and the Secret Key immediately. You will not be able to view the secret key again once you close the window.

Create the secrets/.env.deploy file:

export BUCKET_NAME=your-bucket-name
export AWS_ACCESS_KEY_ID=your-access-key-id
export AWS_SECRET_ACCESS_KEY=your-access-key
export AWS_DEFAULT_REGION=ru-central1
export AWS_ENDPOINT_URL=https://storage.yandexcloud.net/
export BUCKET_NAME=your-bucket-name
export AWS_ACCESS_KEY_ID=your-access-key-id
export AWS_SECRET_ACCESS_KEY=your-access-key
export AWS_DEFAULT_REGION=ru-central1
export AWS_ENDPOINT_URL=https://storage.yandexcloud.net/

Add secrets/* to .gitignore so your secrets will never be committed to your git repository.

Create Script

Create the scripts/deploy.sh file:

source ./secrets/.env.deploy

dist_folder="dist"

is_dist_exists=0
if [ -d $dist_folder ]; then
is_dist_exists=1
fi

should_rebuild=1
if [ $is_dist_exists -ne 0 ]; then
echo ""
read -p " 🚧 The \"$dist_folder\" (build) folder already exists. Rebuild the project? (y/n): " confirm

if [ "$confirm" == "n" ]; then
should_rebuild=0
fi
fi

if [ $should_rebuild == 1 ]; then
echo ""
echo " 🏗️ building..."
echo ""

bun run build
build_status=$?
else
build_status=0
fi

if [ $build_status -ne 0 ]; then
echo ""
echo " 🚨 Build failed!"
echo ""
exit $build_status
fi


echo ""
read -p " 🛳️ Deploy to production? (y/n): " confirm

if [ "$confirm" != "y" ]; then
echo " 🚫 Deploy canceled."
echo ""
exit 1
fi

echo ""
echo " ☕"
echo ""

echo ""
echo " Backup old files..."
echo ""

(aws s3 --recursive mv s3://$BUCKET_NAME/ "s3://$BUCKET_NAME.backup/$(date +%Y-%m-%d_%H-%M-%S)/")

echo ""
echo "Copying new files..."
echo ""

(aws s3 --recursive cp $dist_folder s3://$BUCKET_NAME/)

unset BUCKET_NAME
unset AWS_ACCESS_KEY_ID
unset AWS_SECRET_ACCESS_KEY
unset AWS_DEFAULT_REGION
unset AWS_ENDPOINT_URL

echo ""
echo " 🚀 Done!"
echo ""
source ./secrets/.env.deploy

dist_folder="dist"

is_dist_exists=0
if [ -d $dist_folder ]; then
is_dist_exists=1
fi

should_rebuild=1
if [ $is_dist_exists -ne 0 ]; then
echo ""
read -p " 🚧 The \"$dist_folder\" (build) folder already exists. Rebuild the project? (y/n): " confirm

if [ "$confirm" == "n" ]; then
should_rebuild=0
fi
fi

if [ $should_rebuild == 1 ]; then
echo ""
echo " 🏗️ building..."
echo ""

bun run build
build_status=$?
else
build_status=0
fi

if [ $build_status -ne 0 ]; then
echo ""
echo " 🚨 Build failed!"
echo ""
exit $build_status
fi


echo ""
read -p " 🛳️ Deploy to production? (y/n): " confirm

if [ "$confirm" != "y" ]; then
echo " 🚫 Deploy canceled."
echo ""
exit 1
fi

echo ""
echo " ☕"
echo ""

echo ""
echo " Backup old files..."
echo ""

(aws s3 --recursive mv s3://$BUCKET_NAME/ "s3://$BUCKET_NAME.backup/$(date +%Y-%m-%d_%H-%M-%S)/")

echo ""
echo "Copying new files..."
echo ""

(aws s3 --recursive cp $dist_folder s3://$BUCKET_NAME/)

unset BUCKET_NAME
unset AWS_ACCESS_KEY_ID
unset AWS_SECRET_ACCESS_KEY
unset AWS_DEFAULT_REGION
unset AWS_ENDPOINT_URL

echo ""
echo " 🚀 Done!"
echo ""

This script will check if the dist folder exists. Ask whether we need to rebuild the project. Back up the old deployment to the BACKET_NAME.backup bucket. And upload the current build to the BUCKET_NAME bucket.

Please create the BUCKET_NAME.backup bucket. For example, if your bucket name is static-app, then create the static-app.backup bucket.

Also, install the aws-cli command-line tool. We will need it to manipulate our buckets. See the docs for more info.


curl -fsSL https://awscli.amazonaws.com/v2/install.sh | bash

Make it Live

Let's allow our script to be executed:

chmod +x scripts/deploy.sh

And now we are ready to run it:

./scripts/deploy.sh
./scripts/deploy.sh

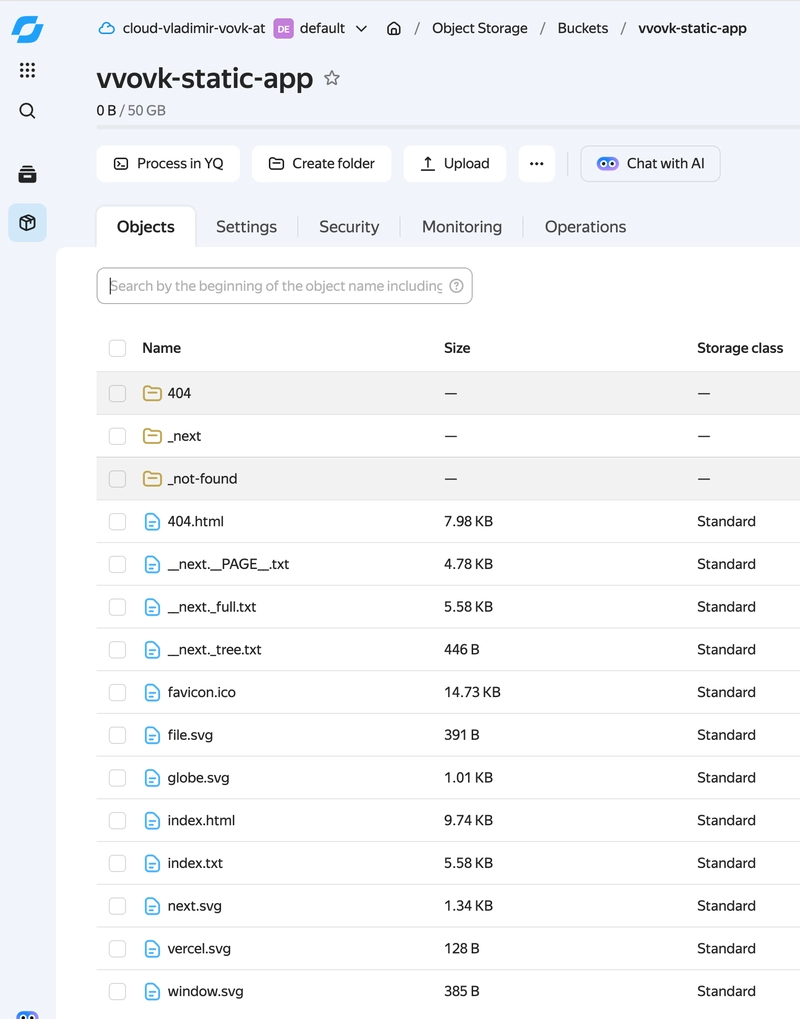
After the script finishes, we should see our build files inside the bucket.

Bucket with build files

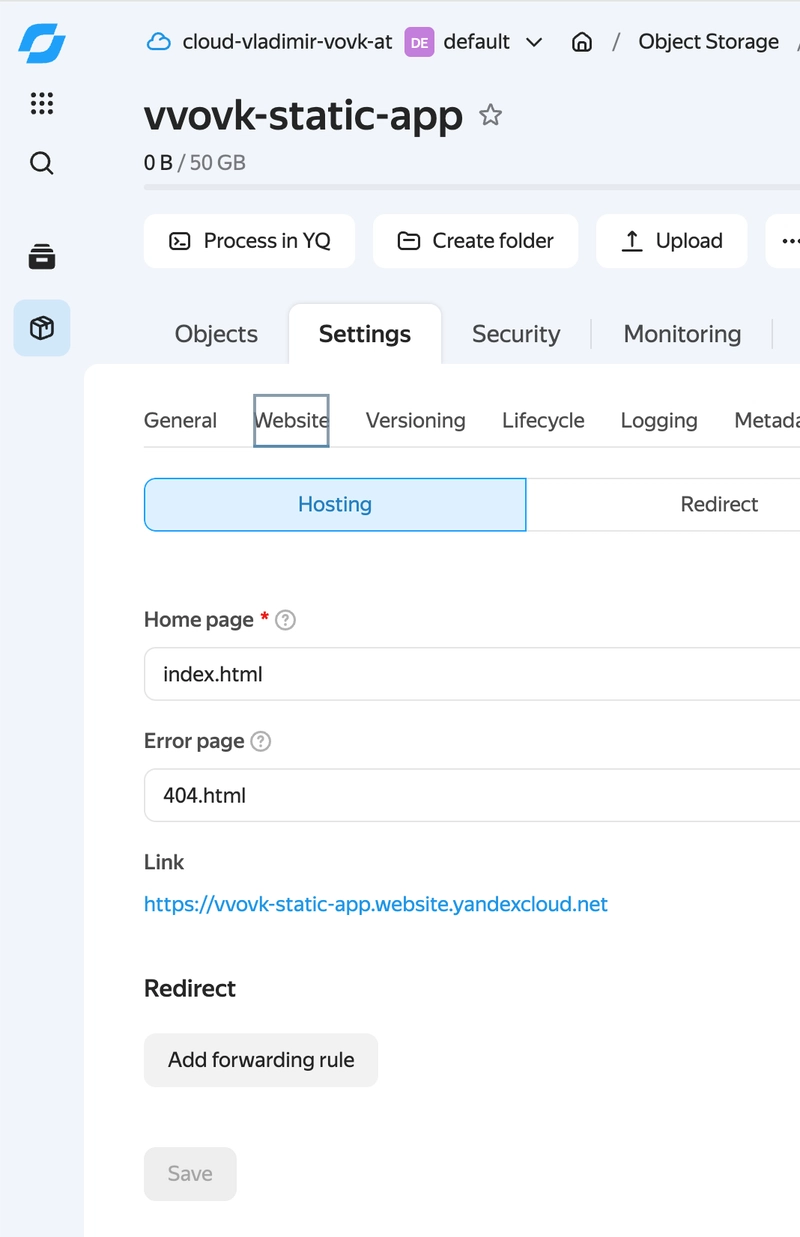
Go to the Settings tab -> Website and click the Link (https://your-bucket-name.website.yandexcloud.net).

Website settings

Congratulations, the app is live now! 🥳

Credits

Photo by Sixteen Miles Out on Unsplash.